
Just landed in Korea? Put away Google Maps for a moment. To travel smoothly and avoid getting lost in South Korea’s complex transit system, you need the essential navigation app: ‘Naver Map’. From exact subway transfer doors to real-time bus tracking, here is the complete step-by-step guide on how to use it.
1. Essential Setup: Checking Your Language Settings
Download the ‘Naver Map’ app from the App Store before your trip. The best part? You can use the app immediately after downloading, without any cumbersome sign-up process!
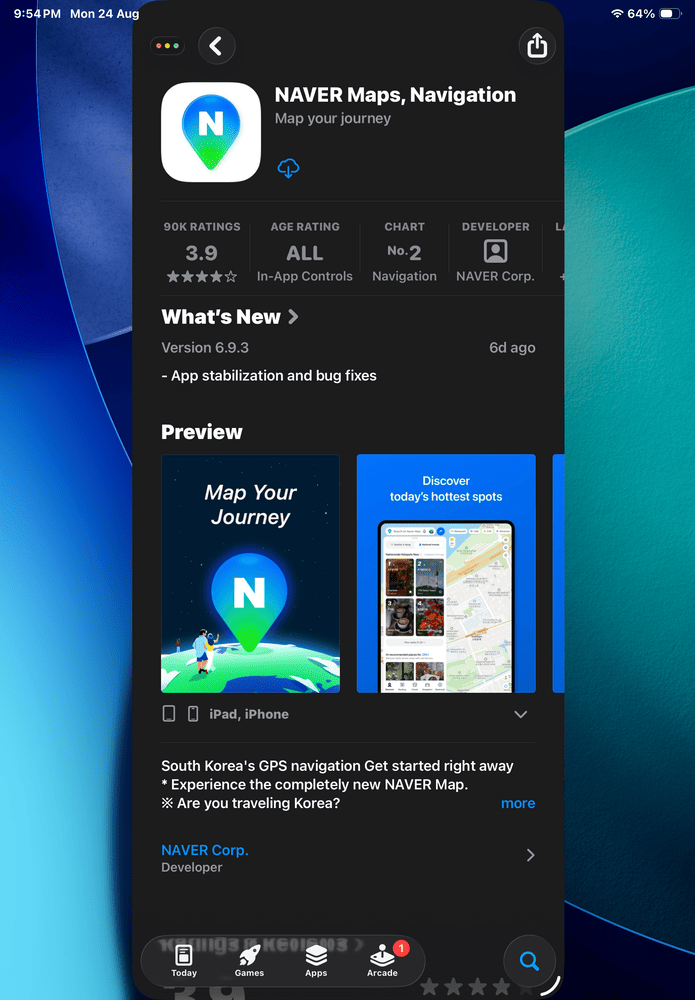
If your smartphone’s default language is English, the app will automatically install in English. But don’t panic if it launches in another language. You can easily change it to English in the settings.
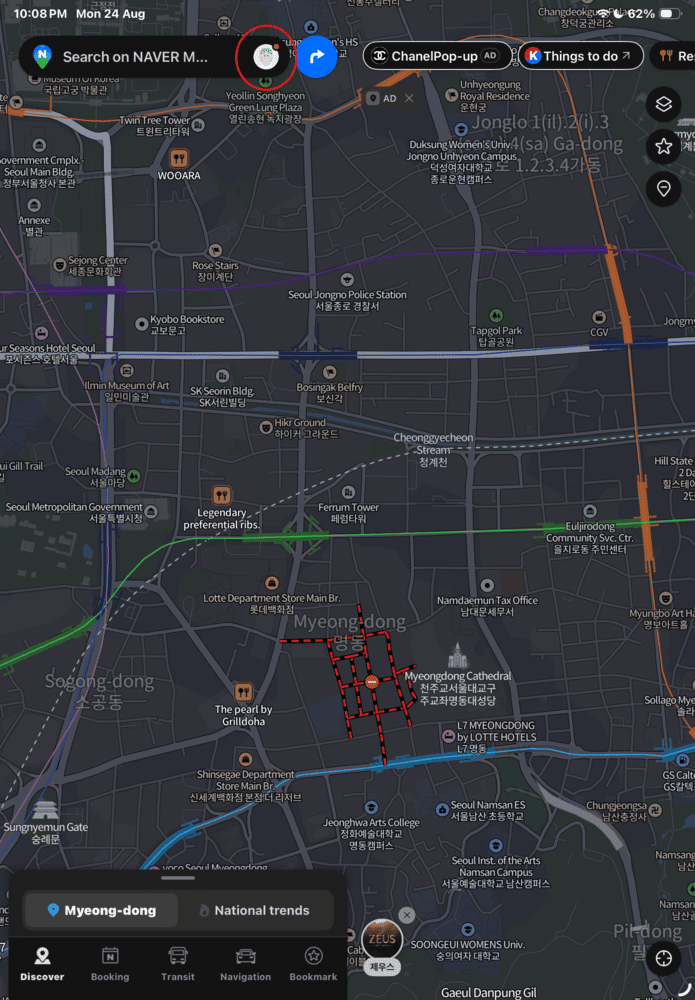
- 📱 Step 1: Tap the profile icon (🙍♂️) on the right side of the search bar.
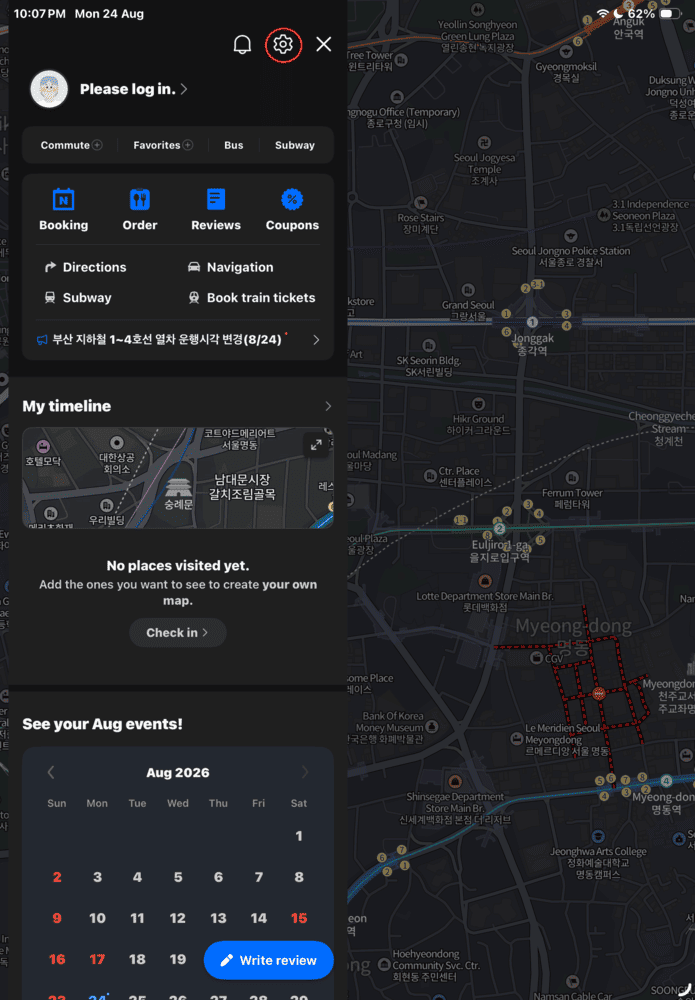
- ⚙️ Step 2: Tap the gear icon (⚙) at the top right.
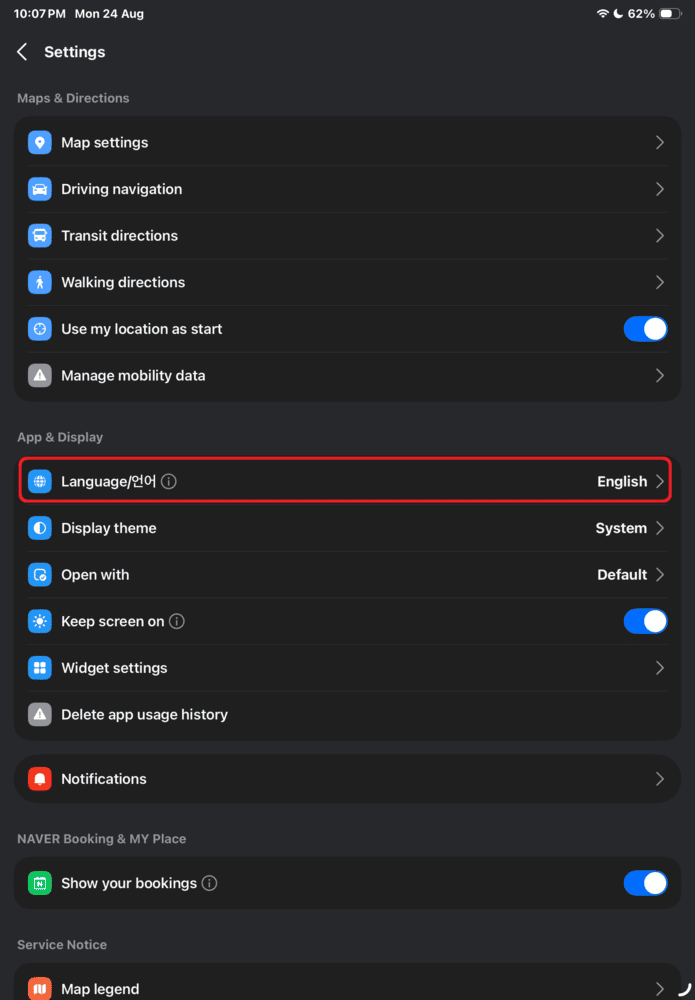
- 🌐 Step 3: In the 언어/Language menu, select ‘English’ and confirm.
2. The Key to Subway Transfers: ‘Exit Numbers’ and ‘Fast Transfers’
This is the most confusing part for first-time visitors to Korea.
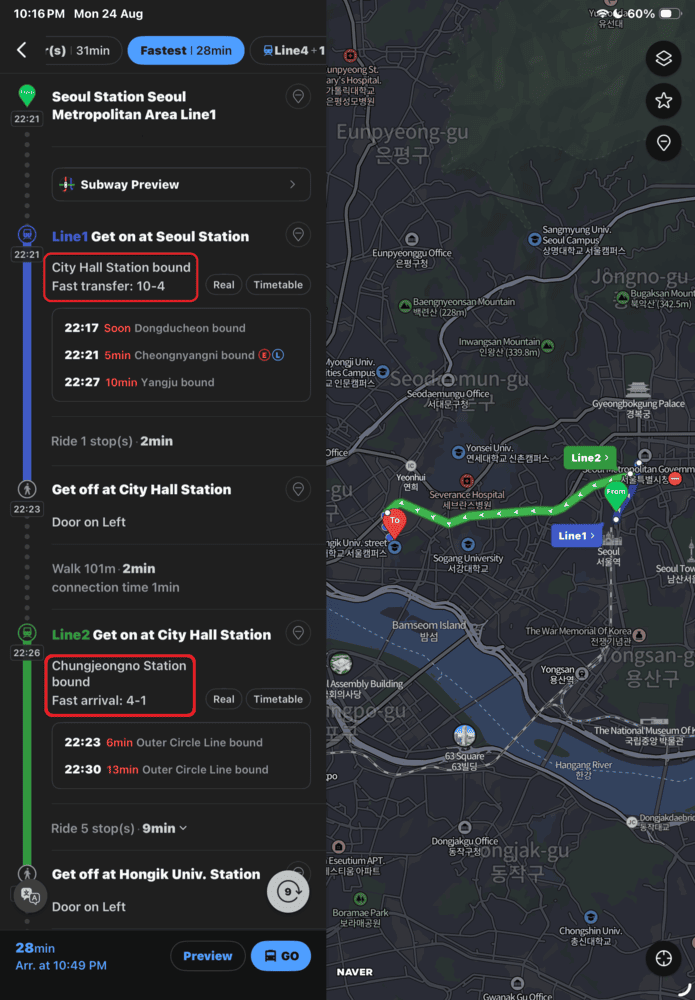
- 🚪 Escaping the Underground Maze (Exit Numbers): Naver Map does an incredible job of telling you “exactly which exit number” you need to take.
- ⏱️ A Lifesaver for Beginners (Fast Transfers): It tells you the optimal train car number(e.g., 10-4) to board. If you stand in front of this number written on the platform floor, the transfer stairs will be right in front of you as soon as you step off!
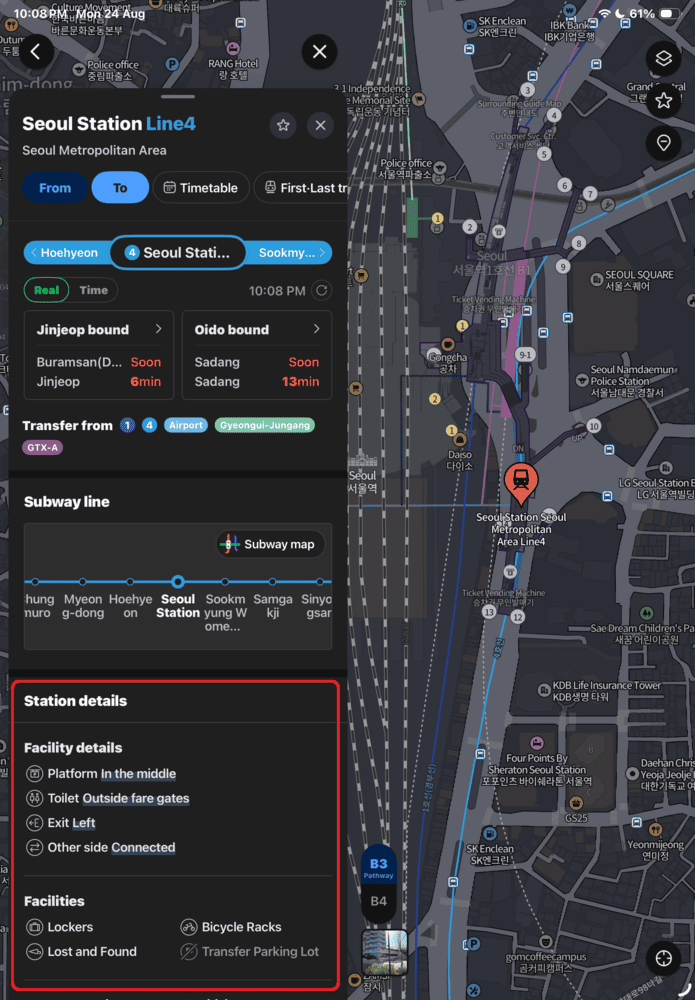
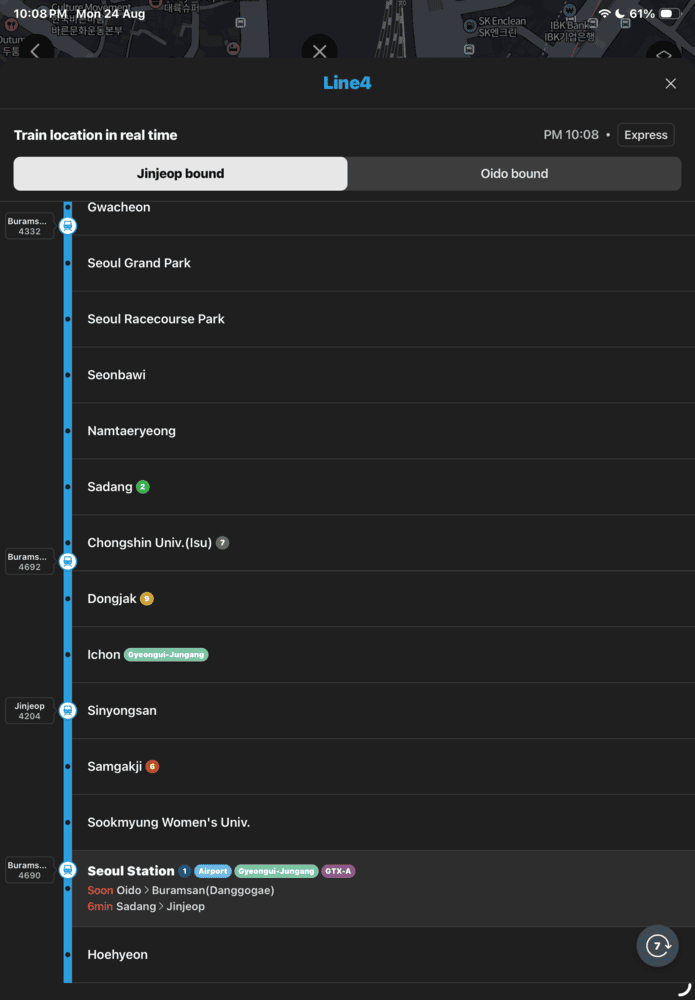
- 🚻 Real-Time Location & Facilities: Tap the route to see the train’s real-time location. Also, tapping the station name lets you check in advance if there are restrooms (inside/outside fare gates) or lockers, which is incredibly useful for travelers.
📌 Wait! Still not sure how to find the platform door number (like 10-4)?
Don’t worry! We will cover the ultimate local tips for mastering Korea’s complex subway system in [Part 9 & 10: The Complete Seoul Subway Guide]!
3. The Key to Riding Buses: Match the App with the Actual Bus ‘Color’
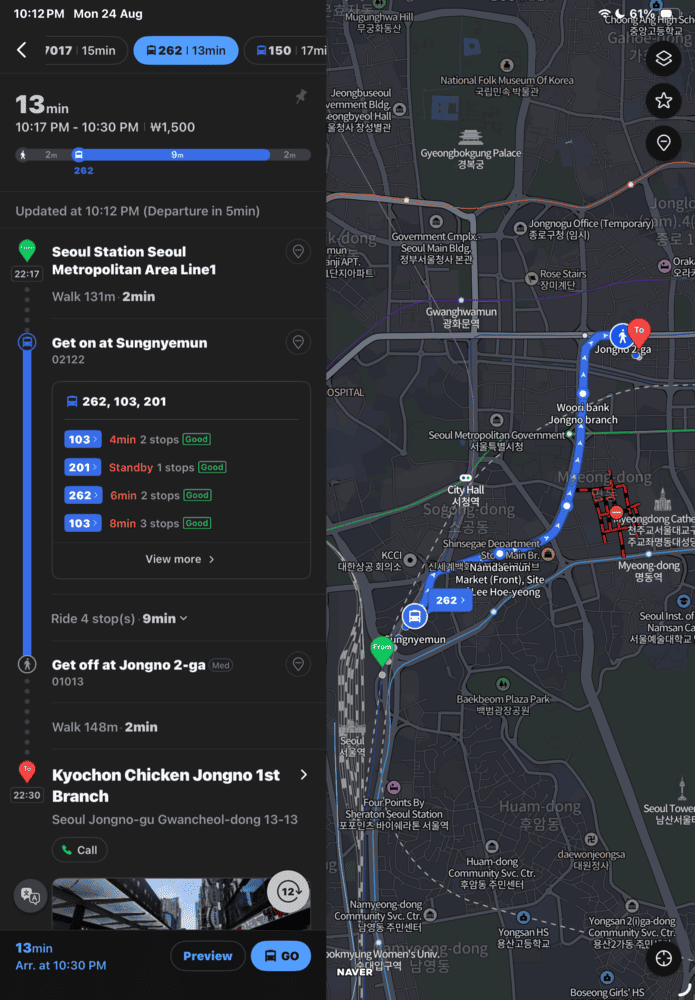
When you search for a route on Naver Map, the bus number is clearly displayed with an icon that matches the actual color of the bus. Always look for the ‘bus color’ first at the bus stop!
- 🔵 Blue Bus (Main Line): Main buses that run across major large roads in Seoul.
- 🟢 Green Bus (Branch Line): Short-distance buses connecting subway stations and residential areas in every corner.
- 🔴 Red Bus (Rapid): Express buses quickly connecting Seoul to surrounding cities (Incheon, Gyeonggi, etc.).
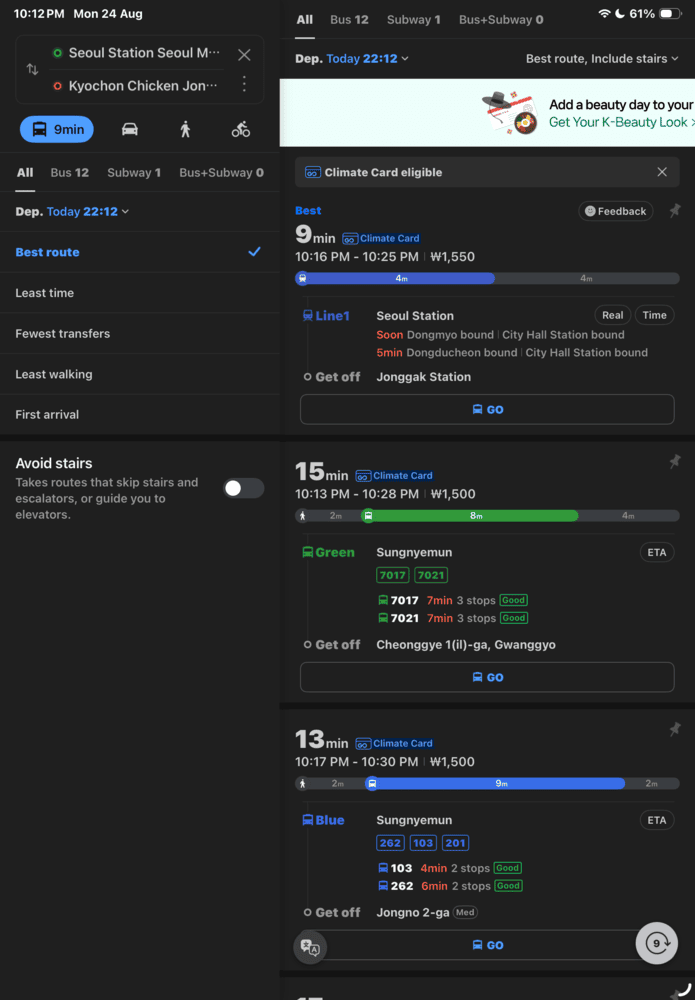
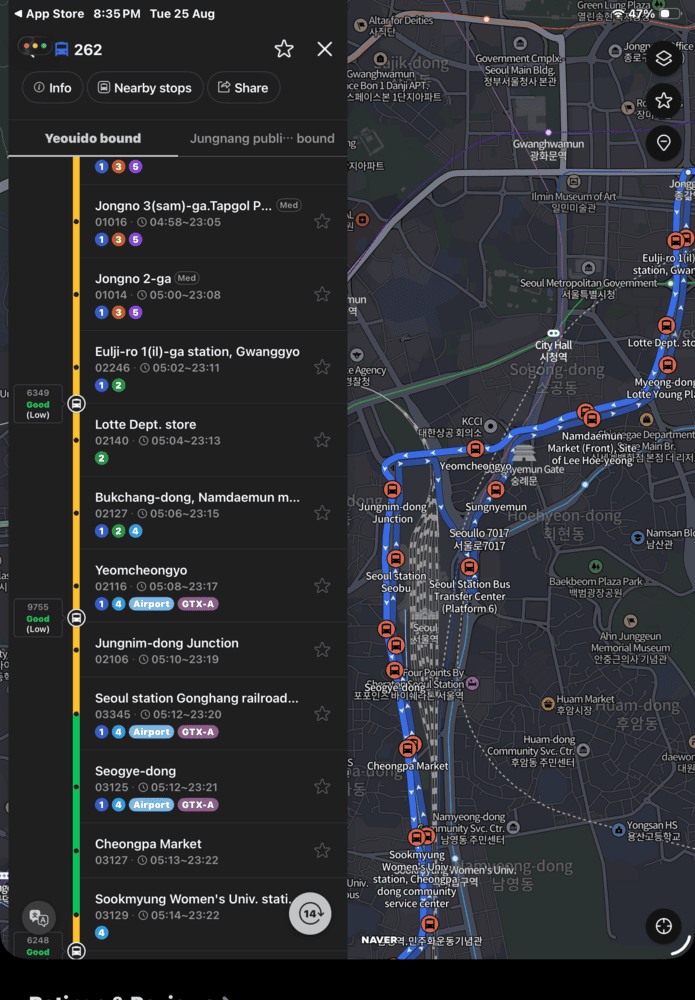
📍 Detailed Route & Real-Time Tracking: Once you select a bus, you can see its exact route. The app even shows where the bus is right now and provides a street view thumbnail of your stop!
📌 Wait! Can I pay with cash when taking the bus?
We will dive deep into practical bus riding tips in our upcoming post, [Part 7 & 8: How to Ride Seoul Buses Like a Local].
4. Perfect ‘Walking Directions’ That Google Maps Misses
Naver Map’s true power shines when you get off public transit and walk to your destination.
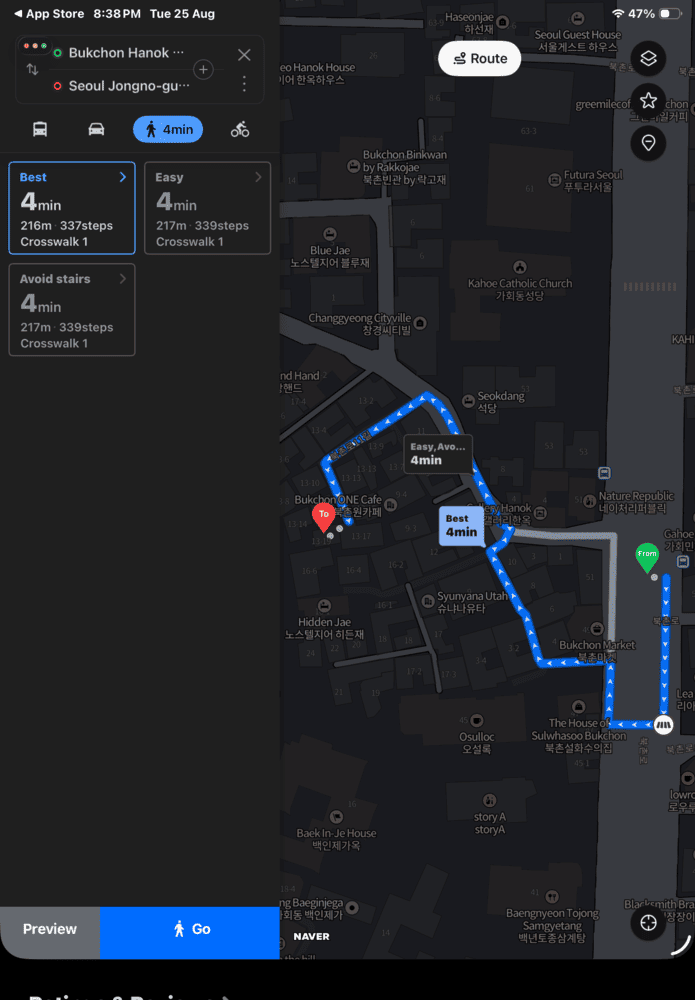
- 🗺️ The Entire Route at a Glance: Your walking path is clearly shown with a blue line.
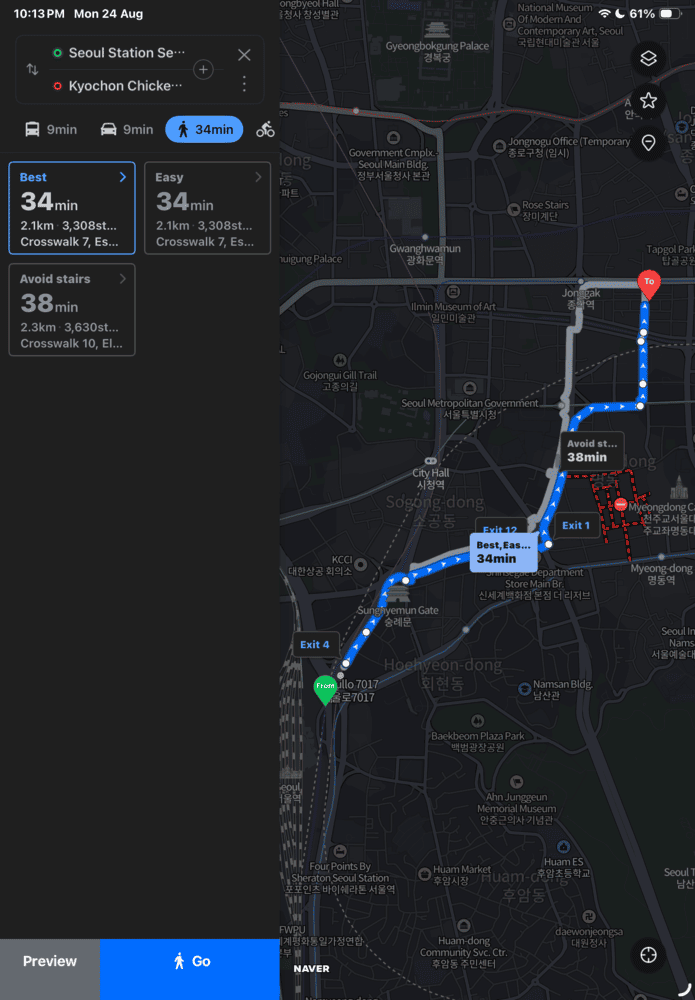
- 🚦 Exact Crosswalk Locations: On massive 8-lane roads, it precisely guides you on exactly which crosswalk is the fastest to take.
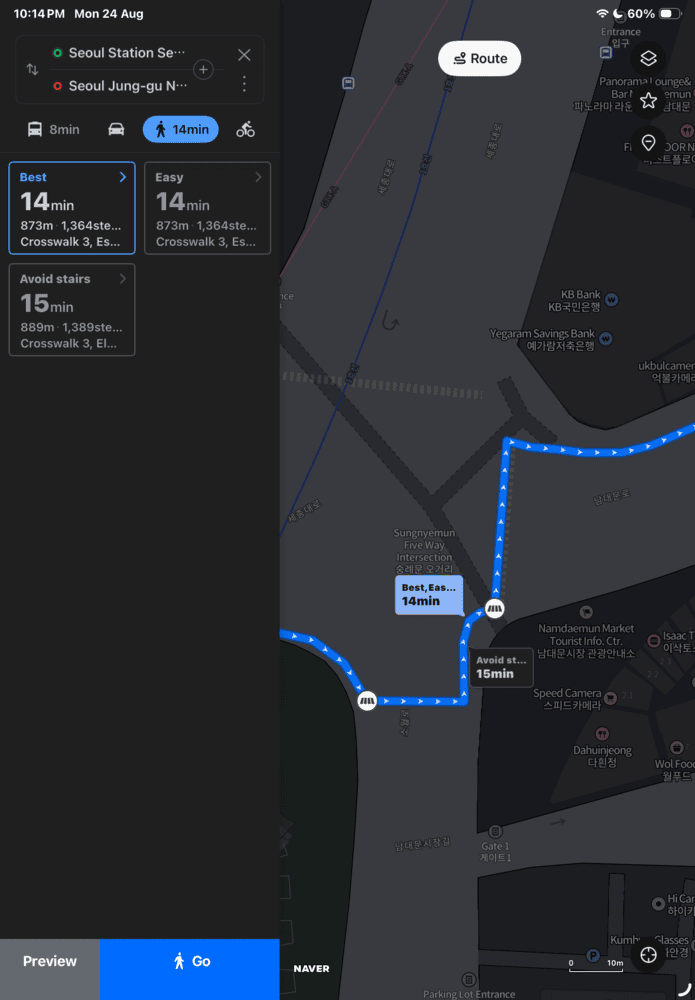
- 👟 Hidden Alleyway Navigation: It flawlessly navigates you through maze-like narrow alleyways in popular areas like Seongsu-dong or Hongdae.
5. Pro Tip: Search by ‘Phone Number’ Instead of Business Name
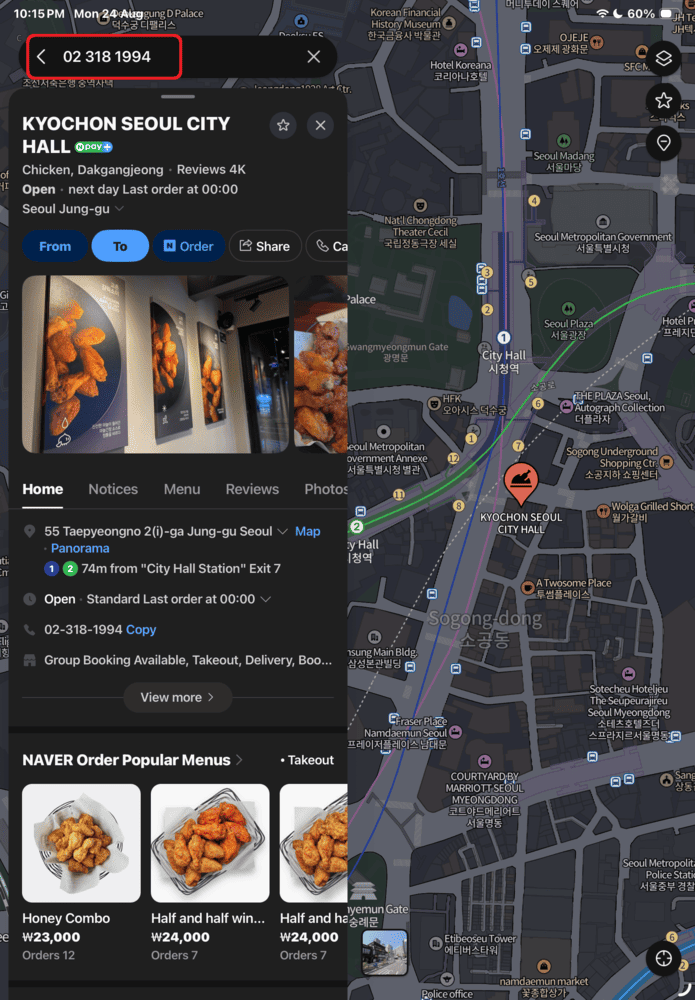
💡 Pro Tip: Sometimes, you might not be able to find a restaurant or cafe because the English spelling differs. In this case, simply copy the store’s ‘phone number’ from Google and paste it directly into the Naver Map search bar.
Korean businesses can be located with 100% accuracy using just their phone numbers! (Note: Newly opened stores that haven’t been registered on Naver yet might not appear.)
👉 Next UP: Now that you’re ready to find your way around with Naver Map, it’s time to prepare your ‘transit card’ for public transportation! In the next part, we will explore [🔗Part 6. WOWPASS vs. T-money: The Best Payment & Transit Card Combo] tailored to your travel style. If you have any questions, feel free to leave a comment below!